CSFFLogo150

Phone: +1-833-275-2400

Honeymooners Good Mother Stallard’s Bean Salad

In honor of this Mom’s favorite fruit and the newly married happy Honeymooners who are currently driving to Omaha.

Also known as Bean, Coconut Rice, Pineapple Salad

Ingredients

    • One package (approximately 3 cups) Chili Smith/Blonde Chico Rice

    • 3 cups liquid

      I used:  1 can Organic Coconut Milk (approximately 1 1/4 cups) Organic Coconut Water (enough to equal remaining 3 cups next time I might just use coconut water and pineapple juice)

    • 3 cups cooked and rinsed Chili Smith Good Mother Stallard’s Beans

    • 1/2 tsp Chili Smith Three Peaks Salt

    • 2 Organic Red Bell Peppers – chopped

    • 1 large organic red onion -chopped

    • 3 cups fresh pineapple – cubed

    • 1 cup Organic cilantro – chopped

    • 1/2 cup Organic chives – chopped (from my backyard!)

    • 3 juiced limes plus 1 T lime zest (or more)

    • 1 cup Organic unsweetened coconut

    • 1 cup pureed pineapple (To make pineapple puree. Chop fresh pineapple, place in blender until smooth. About 2 cup chopped pineapple should make 1 cup puree)

    • 2 tsp fresh ginger grated

    • 3 Tbsp jalapeño pepper finely chopped

Instructions

I, of course, used the Instant Pot to make my coconut rice.  Please use whatever rice cooking method works best for you.  Let rice cool.

While rice is cooking, prepare beans and vegetables as well as dressing.

For Dressing

After I pureed the pineapple in the Vita Mix I added the lime juice, zest, grated ginger, jalapeño pepper, 2 tbsp. red onion finely chopped and 1/4 cup chopped cilantro.  I pulsed it for about 5 seconds. I didn’t want it super smooth. 

When rice is cooled, add in the black beans, coconut, pineapple, red bell pepper, remainder of the red onion, 1/2 cup cilantro and chives.

So many variations that I can’t wait to experiment with.  This is my favorite version so far. 

Twy’s New Favorite Salsa – Super Easy!

Twylas Super Easy Salsa With Add Beans

This bean salsa recipe is incredibly simple and quick to prepare, making it a perfect addition to any meal. With just a few fresh ingredients, including heirloom beans, tomatoes, onions, and cilantro, you can create a vibrant and flavorful salsa that enhances the taste of your dishes. Ideal for serving with chips or as a topping for tacos, this salsa is sure to become a favorite in your kitchen. Enjoy the fresh, zesty flavors that come together effortlessly in this delightful condiment. Put everything in bowl and enjoy! 

Ingredients

    • 2 cups finely chopped organic heirloom tomatoes
    • 1/2 cup Chili Smith Eye of the Goat cooked beans
    • 2 cloves garlic, pressed or minced
    • 1 tablespoon lime juice 2 tablespoons
    • minced fresh cilantro
    • microgreens
    • 1 tablespoon minced red onion
    • 1/2 teaspoon chili powder 1/4 teaspoon cayenne pepper
    • 1 teaspoon minced jalapeño pepper, or other chili pepper

Chili Smith White Bean Pesto

Ingredients:

  • 1/4 cup pine nuts
  • 2 cups mixed power greens: (kale, spinach, chard)
  • 1/2 cup packed basil leaves, plus a small sprig for serving
  • 3 garlic cloves, minced
  • 2 tablespoons fresh lemon juice
  • 1/4 cup nutritional yeast
  • 1 1/2 cups Chili Smith White Eye Heirloom beans, cooked
  • 1 – 16 oz. bag Chili Smith Ancient Agro pasta, cooked

Directions

Put the pine nuts into a small skillet and place over medium heat. Cook, stirring often, until the nuts are toasted – about 5 minutes. Remove from heat and cool completely.

Add the pine nuts, power greens, basil, and garlic to the food processor and pulse until finely chopped.

Add the lemon juice and nutritional yeast, and process until well combined.

Add the Chili Smith White Eye Heirloom beans and blend until smooth, scraping down the sides of the bowl as needed.

Toss with Chili Smith cooked pasta.

Here is how I cooked the pasta in the Instant Pot:

1 lb Chili Smith Ancient Agro pasta
4 – 5 cups water

Instructions

Put pasta and water in the Instant Pot. Close the Instant Pot lid and set the valve to Sealing position. Press the “Manual” button and set the time to 1 minute. When it finishes cooking, let the Instant Pot naturally release the steam for 5 minutes, then quick release the remaining steam. I placed a kitchen towel over the vent.

Chili Smith Beans and Greens Artichoke Dip

Chili Smith Beans and Greens Artichoke Dip

Notes on dish… Just finished making this.  It looks and smells delicious.  Here’s the recipe I made up.  Next time I will make it using ALL beans.  I used cashews this time because I wanted some beans for the second batch of cookies and some beans to show the consistency of how I cooked them so that I could show everyone how creamy they were for the dip.

Ingredients:

  • 1/2 cup dried chopped onion (or small chopped onion)
  • 3 cloves garlic – chopped
  • 1/2 cup roasted red pepper – diced
  • 1 Tablespoon chopped Jalapeno slices
  • 1 tsp Chili Smith Outlaw Seasoning
  • approximately 5 cups Power Greens – chopped
  • 1 can artichoke hearts – chopped
  • 2 cups Chili Smith White Eye Beans (cooked and drained)
  • 1 1/2 cup soaked cashews (use all beans if avoiding nuts)
  • 1/2 cup Nutritional Yeast 
  • 1 T Chili Smith California Balsamic Lemon Vinegar
  • 1/4 – 1/2 cup water
  • Brad’s Kale Chips (crushed)
  • Chili Smith Twyla approved Crackers
  •  

Instructions:

  • Preheat oven to 375 degrees.
  • Sautee onions in water for approximately 2 minutes.  Add garlic, roasted red pepper, Jalapeno, and seasoning.  Cook for approximately three minutes. Add Power Greens and cook until wilted.  Set aside.
  • In blender (I used a VitaMix), process until smooth beans, cashews (if using), Nutritional Yeast, vinegar and water.  
  • Then add sauteed greens mix to blender and process for about 30 seconds or desired consistency.
  • Pour mixture into oven safe baking dish.  Top with Brad’s Kale Chips and bake for approximately 22 minutes.
  • Serve with Chili Smith Twyla Approved Crackers


Post Notes:

As most of you know; when I am preparing dishes for a cooking demo, I tend to use LESS spices than I normally would because everyone’s level of spice tolerance is different.  It’s much easier to add more Jalapeno, Srirachi Sauce, etc. than it is to take it out. So please, if it’s not spicy enough for you – add more. 

Another note:  This would be so good on top of a pizza crust!

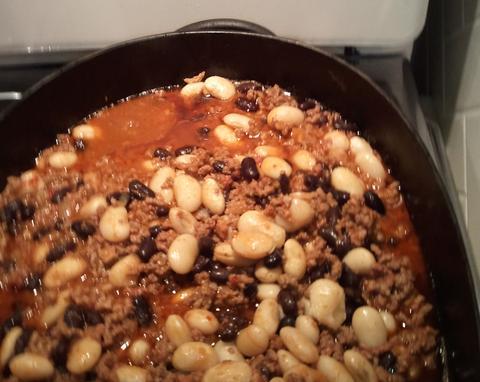
Dutch Oven Cowboy Beans by Chili Smith

Preparation:

  1. 14 oz package of Chili Smith Heritage Beans – we like Jacob’s Cattle Gold or maybe Tiger Eye. 
    – Rinse the beans and then soak them for eight to twelve hours in lots of water.
    – Drain the soak water, add a little salt and fresh water to a level just above the beans and bring to boil. Reduce to simmer for 40 minutes or an hour until tender to the touch.
  2. One pound of Bacon Ends and Pieces diced fine.
    – Sautee in a heavy bottom pan – we like cast iron.
  3. One large Onion – Margaret found natural green onions – we use yellow, red, or sweet
    – Dice in ¼ inch pieces and add to bacon until clear.
  4. 3-4 Garlic Cloves or one tablespoon of diced garlic
    – Add to batch and continue sautéing
  5. Add drained beans to mix – some cooks save the cooked beans water for other uses.
    – Fold all together and add sauce.

Sauce:

  1. One – 18 oz bottle of BBQ Sauce – we used KC Masterpiece KC Flavor – I like Stubbs Original brand as well.
  2. 1 or 1 ½ cups catsup
  3. 1 cup honey
  4. ¼ cup Dark Molasses
  5. Kosher or Himalayan Salt, Cracked Pepper, Garlic and Onion Powder to taste

If you like spicy – add some chili powder or crushed jalapeño peppers – I like to add that later for individual taste.

Stir the sauce into the beans and bacon mix and keep at simmer temp or just below for several hours with a lid on.

This can go in an oven at 200 degrees or over coals and covered with soil in a Dutch oven.

Can be served right away and/or refrigerated for great flavor blending.

This can freeze for use later.

You will find a dark, very fragrant, sweet and sour BBQ flavor that is incredible as a side dish with Burgers, Hot Dogs or all by itself for Fourth of July Parties and summer outings.

This will produce about one-half gallon of beans. For larger gatherings simply use a 28 oz package of beans and double the balance of ingredients.

Cowboy Up!

Wade and Margaret were from pioneering families in northern California and like many of the ranchers – then and now – they took their cattle from the valley to the higher elevations of the Sierra Mountain Range during the summer. There is less heat and still, plenty of nutritious green grass and cool, clean snowmelt water in the mountains east of Jonesville long after the grasses of winter and spring had dried in the valley.

Their summer home was an old mountain cabin in a beautiful meadow right on the path the stagecoach had taken years before. The barn and cottage had served as the changing station for horses pulling the stages and livery wagons up the Sierra. This was not an overnight destination in the old days of California – that was the Jonesville Hotel – this was a place to break while the hands changed horses for the next pull on the way towards Reno.

We always looked forward to visiting them because of the history and stories that were shared. Margaret was superb at fly fishing and Fresh Mountain Rainbow Trout were a steady part of their diet as was venison from the deer in the area. They had no indoor plumbing, electricity, propane or anything other than what was used in the days of the stagecoach station.

It was a very cool place to visit, and Wade and Margaret didn’t get many visitors on this all-but-forgotten dirt road. Their days consisted of doing all the chores necessary to live in a remote location and when not tending to cattle and other livestock, there was a small garden patch where fresh vegetables grew when the deer didn’t eat them! Shopping in a town was not even a weekly occurrence so when friends would come with the mail, we always knew to throw in some special items from town!

These were competent, self-sufficient and self-reliant people. There was nothing they could not do and they were great teachers and fun to be around.

After spending the day on horseback or moving some bales of feed from the barn for horses, milking to make butter (and that wonderful, rich, unpasteurized liquid that becomes milk), gathering and splitting wood for the stove and fire, gathering berries that grew naturally (“keep an eye out for the bears” Margaret would warn as we left with our pails…) or picking tiny little apples off trees planted by the original stagecoach workers and then making incredible jams and fresh pies made for big appetites! Oh, what appetites!

One of the staples always on hand was dried beans. Margaret made soups, chili, salads and seemingly everything with beans – and were they ever delicious! There was an outdoor cooking area on warm days and a place to gather around a nice fire on cool evenings and an antique wood-burning stove and oven in the cabin kitchen. What beautiful breads, pies, cobblers, and cakes came out of that thing! Always, always, there was a big cast iron Dutch oven keeping things hot or cooking something wonderful and often that was a simple dish that included beans. That heavy cast iron pot and a metal coffee pot seemed to be ready all the time.

Many times, those ovens were filled with “left-over’s” from other meals and – as cast iron will – took on a unique flavoring, and always good! Frontier cooks just learned to spice, blend and mix to create healthy, filling and deliciously long lasting meals! And the aroma?! Oh, my!

Well, this recipe is based on my memory of those days. It is simple, flavorful, and nutritious and gets better with age! It reminds me of that sweet couple and glorious times of old. Enjoy!

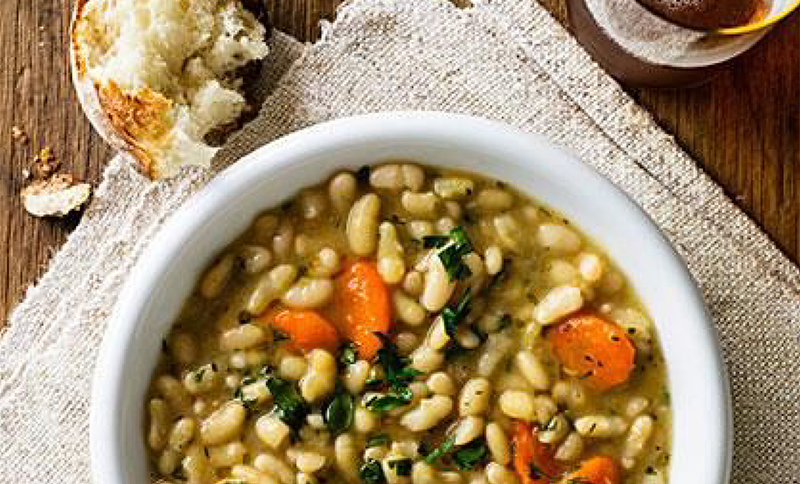
Flageolet Beans with Rosemary and Thyme

Flageolet Beans Basil

Ingredients

  • 12 ounces dried flageolet beans
  •  6 garlic cloves, peeled
  •  2 teaspoons kosher salt
  •  2 teaspoons finely chopped fresh rosemary leaves, plus sprigs for garnish
  •  2 teaspoons finely chopped fresh thyme leaves, plus sprigs for garnish
  •  2 carrots, peeled and cut into 1/2-in. slices on a diagonal
  •  About 2 tbsp. extra-virgin olive oil
  •  1/4 cup roughly chopped flat-leaf parsley, divided

Directions

Put all ingredients including 2 tbsp. oil but not the sprigs or parsley in a 4- to 6-qt. slow-cooker. Add 5 cups boiling water and stir. Cover and cook until most of liquid is absorbed and beans are very tender, 2 1/4 to 3 hours on high or 4 to 4 1/2 hours on low.

Stir in 3 tbsp. parsley. Transfer to a serving dish and drizzle with more oil. Garnish with rosemary and thyme sprigs and remaining 1 tbsp. parsley.

Note: Nutritional analysis is per main-dish serving. Servings Serves 4 (8 or 9 as a side)

I cooked these on high in the crock pot and almost all the liquid was gone at the end of the time. I just added back a lot of water and stirred well. These came out much creamier than the picture and were delicious!


Amount Per Serving

Calories 365
Calories from Fat 19
Total Fat 7.9g
Saturated Fat 1.2g
Cholesterol 0.0mg
Sodium 787mg
Total Carbohydrate 56g
Dietary Fiber 14g
Protein 21g

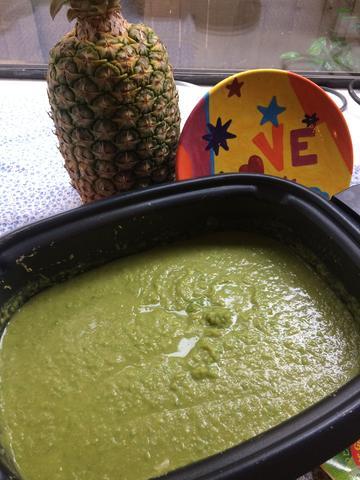
Plant-based Cream of Asparagus Soup ala Twyla

Cream of Asparagus Soup

Ingredients: 

  • 1 yellow onion, thinly sliced
  • 3-4 cloves garlic, minced
  • 2 pounds asparagus, ends trimmed and chopped
  • 2 cups Flageolet beans (cooked)
  • 6 cups vegetable broth
  • Juice of one lime or to taste
  • salt and pepper, to taste or no salt seasoning

Directions:

  1. Use water or broth to sauté onions and garlic and cook until onions are translucent about 7 minutes.
  2. Add asparagus, beans and vegetable broth. (See other add variations). Bring to a boil, then reduce heat to a simmer. Simmer for about 10 minutes, until asparagus is tender.
  3. Transfer soup to a blender (this may have to be done in batches) and blend until smooth. Or use an immersion blender for desired consistency.
  4. Return to heat and stir in lime juice, salt, and pepper.
  5. Various toppings:  parsley, ground flax/chia seeds, Mary’s crackers, Flaxers, GF croutons, pumpkin seeds, riced cauliflower, non-dairy sour cream

Variations:  ADD during the peas/potatoes/rice/broccoli/cauliflower/

Delicious on baked potatoes, served over rice, served in a bread bowl, etc.  

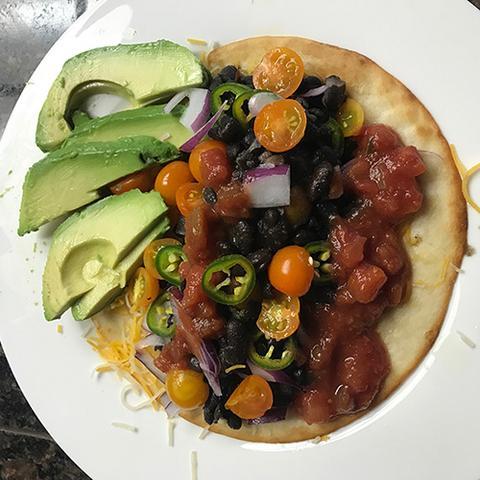
Spicy Black Valentine Bean Tacos by Mike S from Folsom, CA

Cooking Beans:

  • 1 lb. Chili Smith Black Valentine Beans
  • 1 tbsp. sea salt or (Sriracha Salt) or mix
  • 1 tsp. black pepper
  • 1 ½ Tbsp. ground cayenne pepper
  • 3 cloves minced garlic
  • 1 chopped Jalapeño pepper
  • 1 tbsp. Italian mixed herbs (Oregano, Thyme, Sage, Basil, Rosemary)
  • 1 lime – squeezed lime juice

Taco Fixins:

  • Corn or flour tortillas
  • Avocado – sliced
  • Sliced cherry tomatoes
  • Sliced or chopped red onion
  • Sliced Jalapeño pepper
  • Salsa or taco sauce
  • Grated Cheese (Or your favorite Vegan cheese)

Soak beans in water for 24-36 hours:

  1. Cover with water and bring to boil
  2. Add ingredients and simmer for 3-4 hours or until beans are tender
  3. Keep liquid covering beans – Stir occasional and add water if needed to cover beans
  4. Taste for added salt or additional cayenne powder
  5. Best if refrigerated overnight and re-heated

Prepare Taco fixins for taco assembly.
Fry corn and flour tortillas in Olive oil until slightly crispy but pliable.
Assemble your taco and enjoy!!
Delicious!!

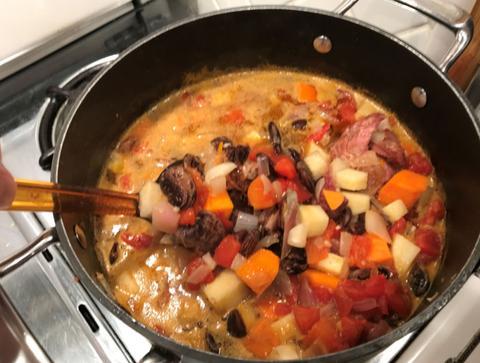
Steveas Ham Bone Healthy Soup by Chili Smith

Note – This soup can be made with any Chili Smith Heirloom bean, and with or without meat.

Meat and Beans:

  • 1 pound Chili Smith Christmas Lima heirloom beans – presoak 8 – 12 hours in clear water – no salt or seasoning.Rinse and place in heavy bottom pot or pressure cooker with ham bone, ham shanks, ham hocks (or lamb!)
  • 1 quart water – make sure beans are covered
  • 1 Bay Leaf
  • 1 tablespoon Chili Smith Soup Seasoning – Garlic, Lemon Pepper, Oregano, Cumin, Dry Mustard, Salt and Paprika
  • Bring to boil or to 10 pounds pressure and reduce heat to simmering. Cook until tender – approximately 2 hours traditional or 15 – 20 minutes pressure While that is cooking…

Soup and Veggies:

  • Large heavy bottom pot – heat
  • 1 – 2 tablespoons Olive Oil – we like chipotle infused
  • 1 cup each diced sweet and red onion
  • 1 diced shallot

    Lift onions and mix with oil – cook until translucent

  • 1 each – Turnip, Yam and Sweet Potato– peeled and diced in 1” cubes or smaller
  • 2 cups – Summer Squash – I like the already prepared from Mann or Raley’s
  • Lift from bottom of pot to coat with onion/oil mix – WHEN all oil is absorbed…
  • 1 cup Organic Vegetable Broth – OR – beer – we like whatever is local…
  • Stir well and cover and allow steaming for five minutes…
  • 2 tablespoons Chili Smith Soup Seasoning – stirred into 1 cup additional broth – add to veggies and allow to come back to boiling
  • Cook at simmer until veggies are getting softer – NOT – fully cooked…
  • 1 medium (303 size) diced tomatoes in sauce – add entire can and sauce to pot and stir
  • Allow to return to simmer, stir well, cover and shut off until beans and meat are ready…

Blend:

  • Add meat and beans to soup pot – aren’t you glad you got a BIG one now? – and turn gently from bottom.
  • Bring back to simmer and allow to gently cook for 15 minutes or more until everything is ready!
  • Add a little moisture – water or broth – if needed
  • DO NOT overcook!

WAIT!:

It is ready to eat and will be delicious now, but will be even better after is has chilled and rested in the refrigerator overnight.

Toppings:

Sour cream, Corn or Tortilla Chips, Diced Green Onions or jalapeños, Sharp Cheddar Cheese – shredded and excellent with fresh Cornbread…

Leftovers:

Freezes very well or can be refrigerated for several days for ‘grab and heat’ quickie meals.

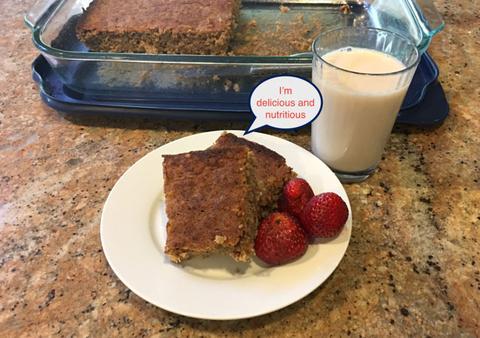
Vegan Sugar-Free Banana Bread Sweetened with Monk Fruit

Ingredients:

  • 3 medium/large ripe bananas (About 1 ½ to 2 cups)
  • 1 cup Monk fruit (Sugar substitute.  I found this at Whole Foods)
  • 1 teaspoon vanilla extract
  • 1 Vegan egg (1 tablespoon ground flaxseed meal and 2 ½ tablespoons water.Mix well and let stand in the refrigerator for 5 mins before mixing with other ingredients)
  • ¾ cup of unsweetened Almond milk
  • 3 Tablespoons melted coconut oil (I add this last to wet ingredients)
  • 3 ½ teaspoons Baking Powder
  • 1/2 teaspoons sea salt
  • 1/2 teaspoon ground cinnamon
  • 1 1/4 cups of Almond meal
  • 1 1/4 cups of oats (Quick oats are fine.  I used gluten-free quick steel cut oats from Costco)
  • 3/4 cup flour (I used Organic flour from Costco as well, if you have gluten allergies, you can use a gluten free flour mixture)
  • 1/2 cup Chili Smith Lupin Bean Flour
  • Spray oil

Preparation:

Pre-heat oven for 350.

Make Vegan egg in a small bowl and let stand in refrigerator.  Smash bananas well in large bowl, then add sugar.  Mix all wet ingredients together in that same bowl.  Mix together all dry ingredients in a separate bowl.  Add Vegan egg to wet ingredients and mix well.  Add all the dry ingredients into the wet, and mix well.  Pour into a 4-quart oblong Pyrex oil sprayed, baking dish.  (This makes awesome muffins too!)  Bake for about 45 minutes to an hour, or until golden brown.  Serve warm with an ice-cold glass of Almond milk.  Enjoy!

*If making muffins, the cooking time will change.  I’d start out with 25 minutes, or until golden brown.

My kids absolutely love this Banana Bread.  They would never know it doesn’t have eggs or sugar in it.  It tastes moist, sweet and delicious.  It’s packed full of fiber and extra protein with Almond meal, Flax seeds, Steel-cut oats and Lupin bean flour.  Yummy!  It’s a great way to start out the day or for an after-school snack.